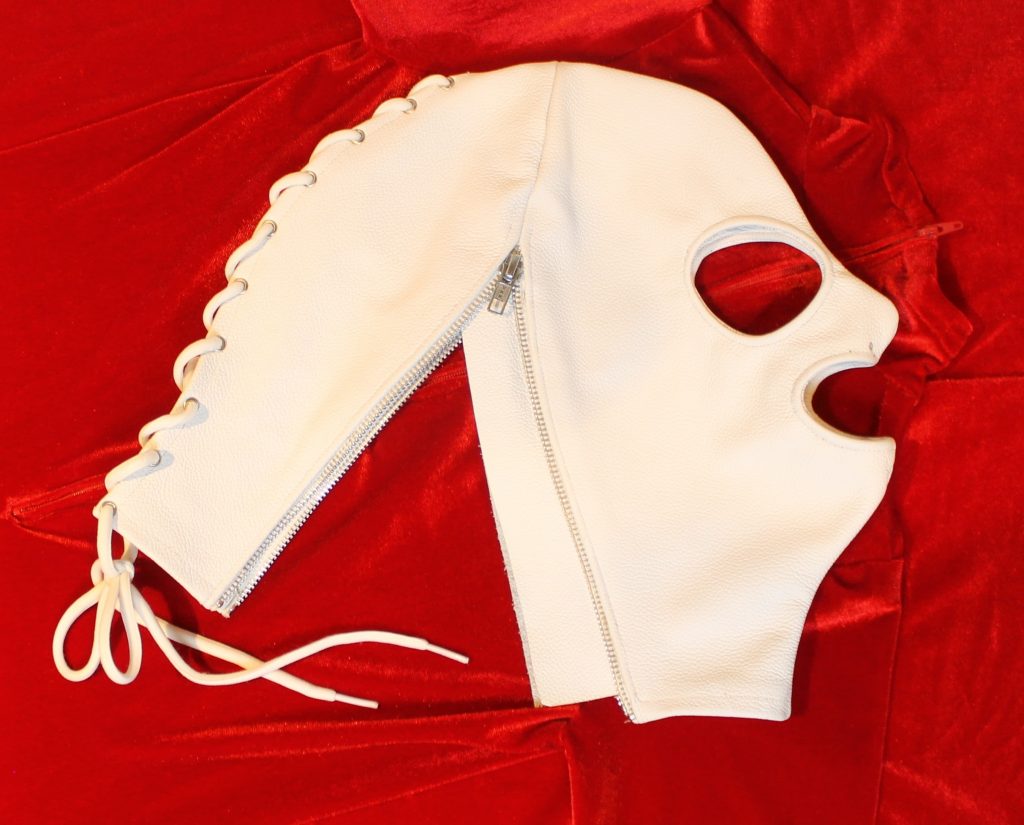
I made an attempt at replicating this white leather mask made by Zana Bayne and A.F. Vandevorst, worn by Rihanna for a 2019 Interview Magazine article. I was intrigued by the side zippers, and I assumed an additional lace closure at the rear – quick in-and-out of a zipper with the comfort and easy fit of a lace closure.
This mask uses a four panel construction, which was not something I was familiar with, but I figured it worthwhile attempting since the seams line up with the zippers. I think it worked out pretty well!
Tools
- Sewing machine (leather needle)
- Shears
- Small scissors
- Drive punch
- Eyelet setter and anvil
- Cutting board
- Hammer
- Pliers
- Measuring tape
- Pencil and ruler
- Water pencil
- Lighter
Materials
- Garment leather
- Matching thread
- 2 x 300mm (12″) metal zipper
- 1200mm (47″) shoelace
- 14 x medium eyelets
- Contact cement
- Paper
Instructions
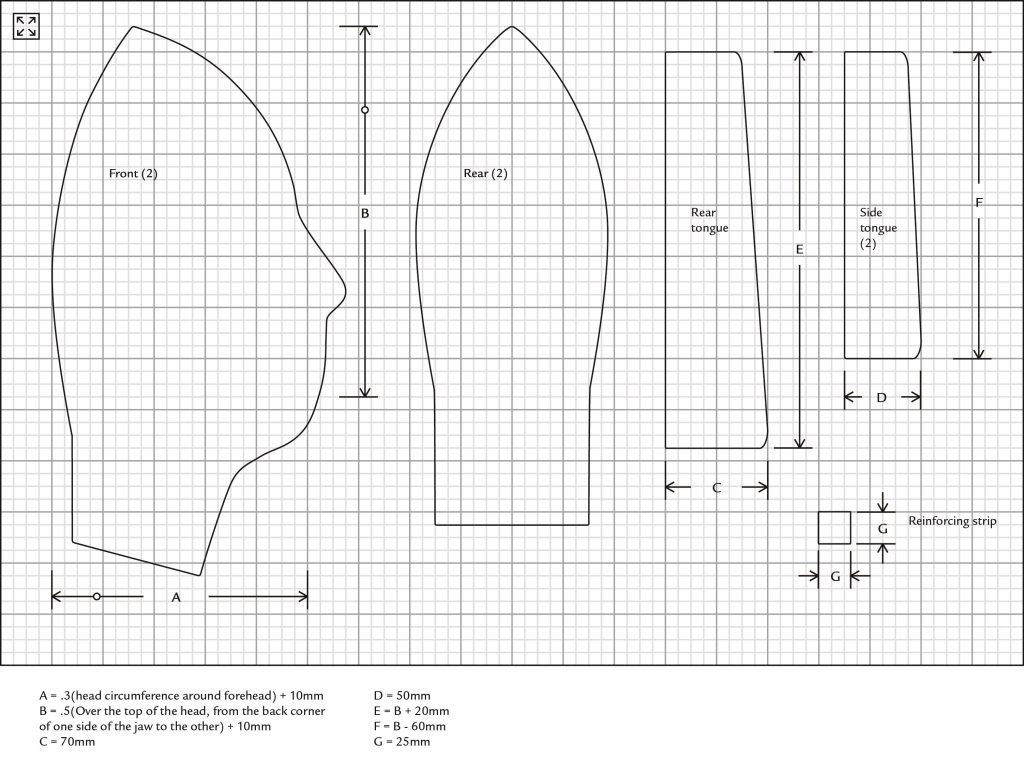
- Draft the pattern as shown. The horizontal cell size for both panels is (.3[head circumference] + 10mm)/5, and the vertical cell size is (.5[over head measurement] + 10mm )/7.25.
- Trace, mark and cut out all panels, taking care to make the front panels and side tongues mirror images of each other.
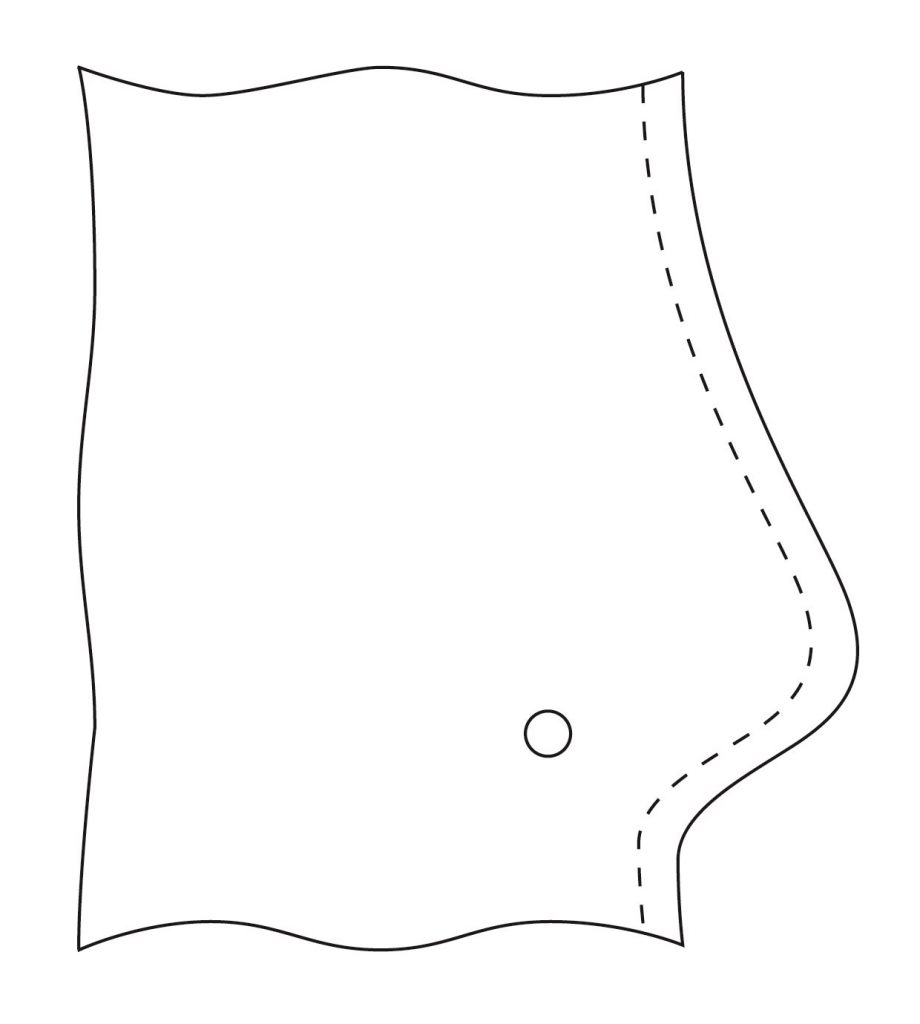
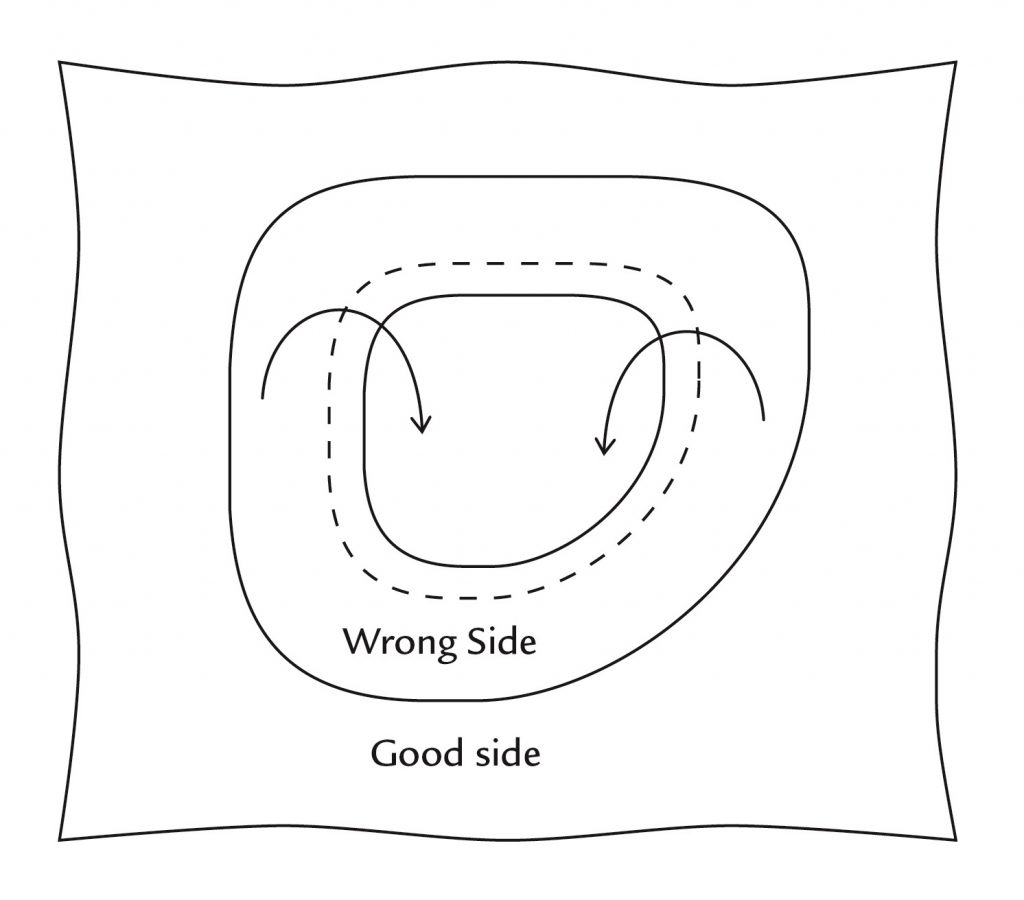
- Align each rear panel with a front panel, grain sides together, and sew the top 110mm, 10mm from the edge.
- Clip off 15mm square sections from the bottom corners of the side and rear meeting edges. This is to minimize the layers to be sewn through once the meeting and bottom edges have been folded.
- Apply contact cement to the outer 20mm of the flesh side of the side meeting edges and make 10mm folds.
- Adjust the zipper length to match the side meeting edges. If using open-ended zippers, hand sew the bases of the zippers together with heavy thread.
- Apply contact cement to the meeting edge fold allowances. Press the zipper in place so the tips of the teeth are flush with the meeting edges.
- Apply contact cement to the outside 5mm of the straight side of each side tongue on the grain side and fix each to the inside of the front sides of the side meeting edges over the zipper. Press all edges firmly and let dry overnight.
- Sew the side meeting edges from the grain side, 5mm from the edge, taking care not to sew through the tongue on the other side of the meeting edge.
- Sew the front panels, grain sides together, 5mm from the front edge.
- Mark the top of the opening on the rear panels 60mm from the apex.
- Sew the top of the rear panels, grain sides together, 5mm from the edge, starting from the opening mark and going over the top of the mask connecting to the front seam.
- Try on the mask, still inside out, and check for fit. If it is too big, keeping the 15mm rear meeting edge folds in mind, pinch, mark up and trim.
- Trim the bottom 30mm the front seam allowance down to 2mm.
- Apply contact cement to the outer 30mm of the flesh side of the rear meeting edges and make 15mm folds.
- Apply contact cement to the flesh side of the reinforcing strip and fix it to the area just above the rear opening. The strip will be sewn in place when the meeting edge folds are sewn. This reinforcement is generally a good practice with this kind of unreinforced opening.
- Apply contact cement to the bottom 30mm of the flesh side of the bottom edge. Make a 15mm fold.
- Apply contact cement to the left 5mm of the grain side of the rear tongue and fix it to the inside of the left meeting edge, over the fold allowance. Press all edges firmly and let dry overnight.
- Sew the rear meeting edges from the grain side, 10mm from the edge, taking care not to sew through the tongue on the right side.
- Sew the bottom edge from the grain side 10mm from the edge.
- Mark seven evenly spaced eyelet holes on each meeting edge, starting 15mm from the top and ending 10mm from the bottom, taking care to ensure symmetry.
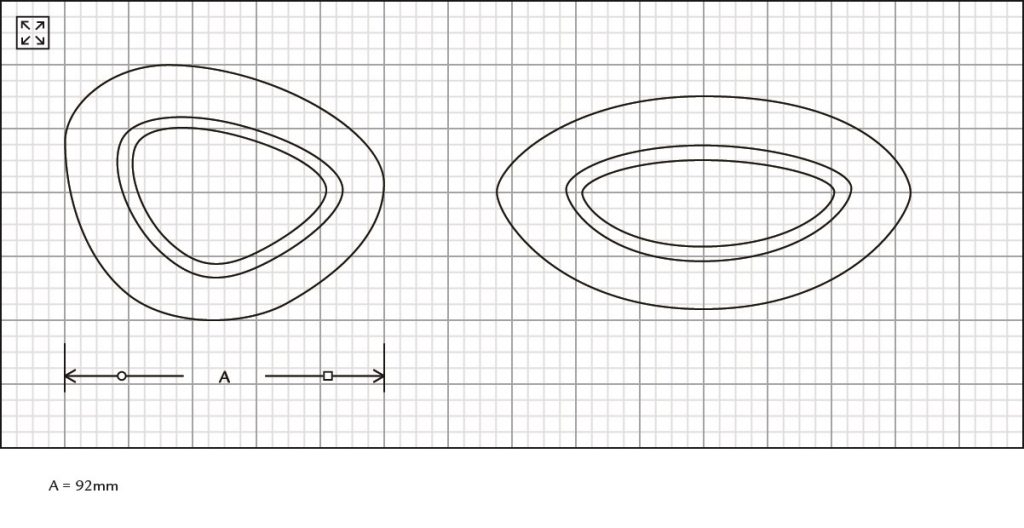
- Mark the nostril holes.
- Punch all holes where marked, taking care not to damage the tongue on both sides of the rear meeting edges.
- Insert and set the eyelets in the rear meeting edges.
- Turn the mask right side out and try it on again. Make small dots over the eyes and the corners of the mouth.
- Trace and cut out the eye and mouth liners, taking care to make the eye liners mirror images of each other.
- Arrange the eye liners on the mask considering the eye markings and keeping symmetry. Trace along the inside of the openings.
- Arrange the mouth liner on the mask considering the mouth markings and keeping symmetry. Trace along the inside of the opening.
- Cut out the traced openings with small scissors.
- If the leather used is more than a couple of ounces in weight, you may want to split or thin the liner leather and/or skive the seam allowances around the openings on the mask. This is to reduce the thickness of the folds and thus the strain on these seams.
- Baste the eye and mouth liners in place grain sides together around the traced openings, 5mm from the inside edge.
- Sew the eye and mouth liners in place 5mm from the inside edges.
- Apply contact cement to the flesh side of the liners and push them through the openings so that the flesh sides are together. Press all edges firmly and let dry overnight.
- Sew openings in place from the flesh side, 2mm from the edge, and trim away any excess backing liner from the inside if necessary.
0 comments on “Side entry mask” Add yours →